5 Common Airbrush Problems (And How to Fix Them Fast)
It Happens to Everyone
Let’s be honest. You’re in the zone, your project is looking great, and then it happens: a sudden, ugly splatter of paint ruins your perfect gradient. Or worse, the airbrush just… stops. Nothing comes out.
Frustrating? Absolutely. A sign that you’re a bad artist or you’re doing something wrong? Not at all.
After 40 years of professional airbrushing, from massive Hollywood productions to 500-person live events, I can tell you this: every single artist deals with equipment issues. The difference between a beginner and a pro isn’t that the pro’s airbrush never clogs. It’s that the pro knows how to diagnose the problem and fix it in 30 seconds, while the beginner gets frustrated and quits for the day.
“Mindful observation” is great but this is about practical, real-world problem-solving. Let’s get you back to creating. These are skills that will help you master of your airbrush.
The 5 Most Common Airbrush Problems (And the Real Fixes)
Here are the five issues that make up 99% of all airbrush frustrations. I’ve seen them thousands of times. Here’s how to fix them, fast.
1. The Splatter
The Problem: Your airbrush suddenly spits out little dots or a big, ugly splatter of paint.
The Fix: This is almost always one of three things.
• Your paint is too thick. It’s not flowing smoothly. Add a drop or two of reducer and try again. The right consistency is like whole milk.
• Your air pressure is too low. The air isn’t atomizing the paint properly. Bump your PSI up by 5 and see if it resolves.
• You have “tip dry.” A tiny bit of dried paint has built up on the very tip of your needle. Gently pinch it off with your fingers or use a small, soft brush. Do NOT scrape it with a metal tool.
PRO TIPS:
-Using a soft brush place a drop of glycerine to keep the tip moist.
-In dry climates like Las Vegas, tip dry happens constantly. Keep a small cup of water and a brush nearby to clean your needle tip every few minutes. This single habit will save you hours of frustration.
2. Inconsistent or Pulsing Spray
The Problem: The spray is erratic. It comes out in weak puffs or pulses instead of a steady, even cone.
The Fix: This is an airflow issue.
• There’s something wrong with your compressor. If you have a piston less. Compressor like these, it could be that the compressor has an issue such as the moisture trap valve being stuck open. The compressor will turn on and stay on. Check the moisture trap. Then check to make sure the hose is tightened to the airbrush quick disconnect on the top end and to the compressor connection. If it’s a tankless compressor check the connections the same way. A tiny air leak will cause pulsing.
• Your nozzle is loose. Gently tighten the nozzle cap at the tip of the airbrush. Don’t crank it down, but make sure it’s snug – finger tight.
3. The Clog (No Paint Flow)
The Problem: Air is coming out, but no paint. You pull the trigger back, and nothing happens.
The Fix: You have a blockage. It’s time for a quick clean.
• Back-flush your airbrush. This is the fastest way to clear a minor clog. Pull back on the trigger. Cover the nozzle cap with your finger and gently press the trigger. Air will bubble back into the paint cup, dislodging the clog. Dump the paint and spray cleaner through.
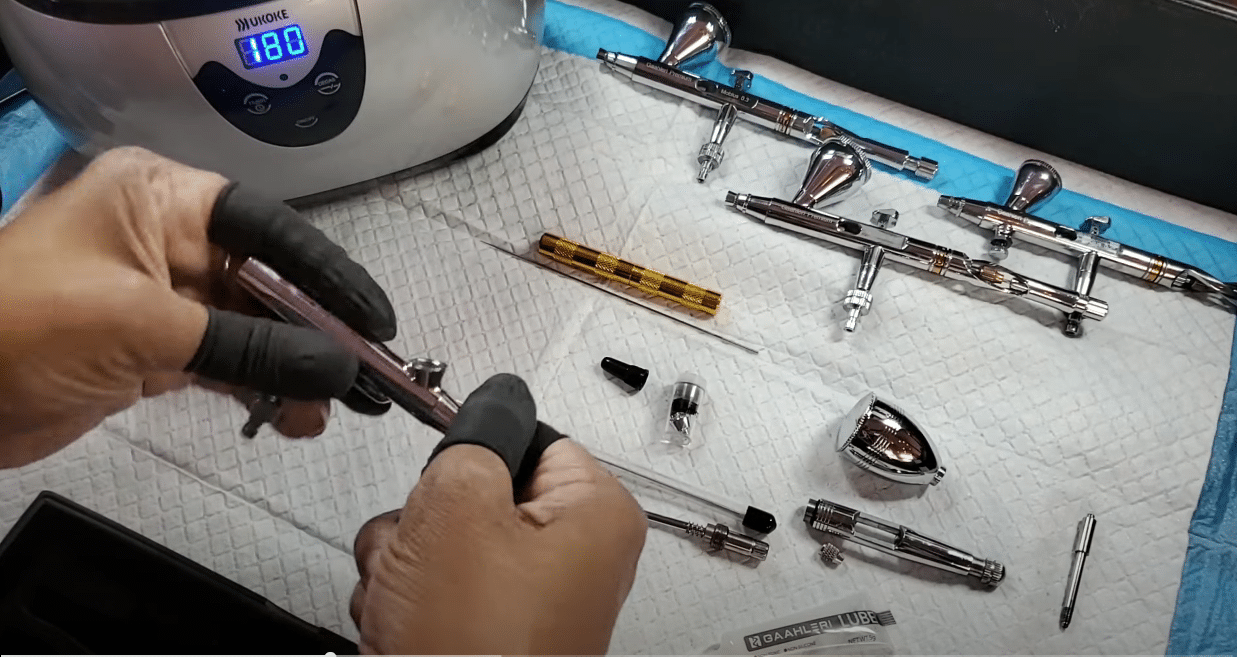
• You have a major clog. If back-flushing doesn’t work, you need to do a deep clean. Disassemble the airbrush, soak the nozzle and other metal parts in airbrush cleaner, and use cleaning brushes to scrub them out. This is a critical skill, not a chore. Become curious about every part and obsessive about keeping each part totally clean at all times.
PRO TIP:
90% of clogs are preventable. If you learn to clean your airbrush properly between every single color change, you will almost never have a major clog during a project.
4. Bubbling in the Paint Cup
The Problem: When you press the trigger, air bubbles back into the paint cup instead of spraying out the front.
The Fix: You have an air leak at the front of the airbrush.
• Your nozzle cap is loose. This is the most common cause. Tighten it.
• Your nozzle is cracked or the seal is bad. This can happen if you overtighten it. Check to make sure your seal is sound. Disassemble and inspect the nozzle for tiny cracks. If you see one, you need a new nozzle.
5. The Bent Needle/Cracked Nozzle
The Problem: Your spray pattern is off-center, or the airbrush sprays even when you’re not pulling the trigger back.
The Fix: Your needle is bent. Even a microscopic bend at the tip will ruin your spray pattern.
• Roll the needle on a flat surface. Take the needle out and roll it on a piece of glass. If the tip wobbles up and down, it’s bent. Don’t try to straighten it. Just replace it. Needles are disposable parts. Gaahleri has replacement parts available on their website and also on Amazon.
PRO TIP:
Never, ever, EVER hang your airbrush on one of those cheap j-hooks that come with some kits. FFS, just don’t do it. It’s the fastest way to bend your needle and crack your tip – possible damaging your airbrush beyond repair. I also do not recommend the kind of stand that hangs off the side of the table. Get a proper, multi-airbrush stand that holds them securely on your work bench, far away from the edge.
Unfortunately these are non existent ob the market so I have some cool DIY solutions that help us hold our airbrushes in our studio and on the road, on set and at events. The key is to keep your airbrushes from falling off a table or onto the floor.
Prevention is Better Than Troubleshooting
Want to know the real secret to avoiding these problems? It’s not about becoming a master mechanic. It’s about building good habits from day one.
In PHAZE 1 of the Airbrush with Grace™ platform, we dedicate an entire section to proper equipment handling, cleaning, and maintenance. When you learn the right way to do things from the start, you spend 99% of your time creating and 1% of your time troubleshooting.
[CTA BUTTON] Join the AWG Entry Portal (FREE) to Learn Professional Habits
Your Next Step
Troubleshooting is a part of the process, but it shouldn’t be the main part. Once you have a reliable setup and have mastered the core skills, you can focus on the fun stuff—like creating incredible art with professional stencils from The Stencil Foundry™.
Don’t let equipment issues derail your passion. Learn the right way to handle your tools, and you’ll be amazed at how much faster you progress.
Ready to stop fixing and start creating?
1. Join the AWG Entry Portal (FREE) to learn the skills that prevent these problems.
2. Shop for professional stencils at The Stencil Foundry™ to elevate your artwork.